- Home
- Slow Stitching
Closing Down
Unfortunately, we're in the process of closing down Crafting4Good CIC after almost
9 years of social enterprise and impact.
Creativity is good for you, but running a busy creative nonprofit on increasingly limited resources is not. As a result the team were stretched, stressed and experiencing the very opposite of "creativity for wellbeing and mental health".
This website *may* stay online under a different name to preserve the legacy and resources created through years of funding with public money.
Promoting Wellbeing:
Slow Stitching & Creative Cloth
Guest Craft Tutorial from 2SureThreads, Wakefield

Letters from Lockdown Slow Stitching Project
15th December Deadline
Life can be so busy and there are times of crisis when it's appropriate. But we also need time to reflect. Not everyone is able to 'get away' for a break but keeping the hands busy in a creative way can provide us with space to reflect, consider and immerse ourselves in simple but rewarding endeavours. All this can only be good.
Hopefully you will be inspired to 'make your mark', knowing that while You are making, so are others. You are not alone and your thoughts, feelings and experiences are of value to the wider world. So, why not join us, those who are expressing themselves through creative cloth? It costs nothing, it connects you to others where there is support and it may give you moments of respite from your busy life and mind.
Ideas for Making a Hands-on Heart Cloth / Letter from Lockdown
Please read all the instructions before starting as you may well come up with different ideas!
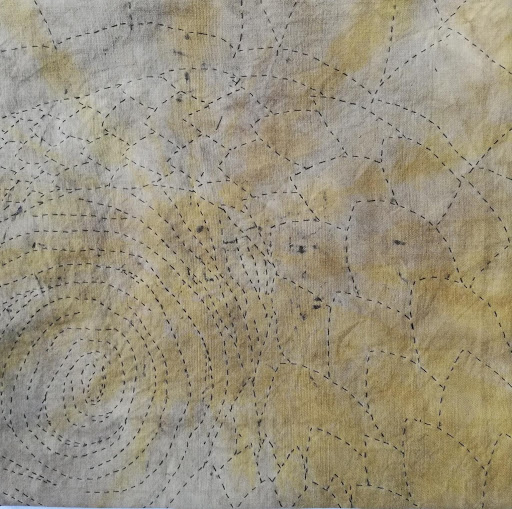
These instructions are based upon using fabric cloth though you may want to make a Letter from Lockdown using knitting, weaving, tapestry, cross-stitch, felt and felting, patchwork, canvas or even paper! Adapt the instructions to your own preference. The more variety, the better and remember, it's about your thoughts and feelings during Lockdown and the present situation. Your 'making' is as unique as your signature.
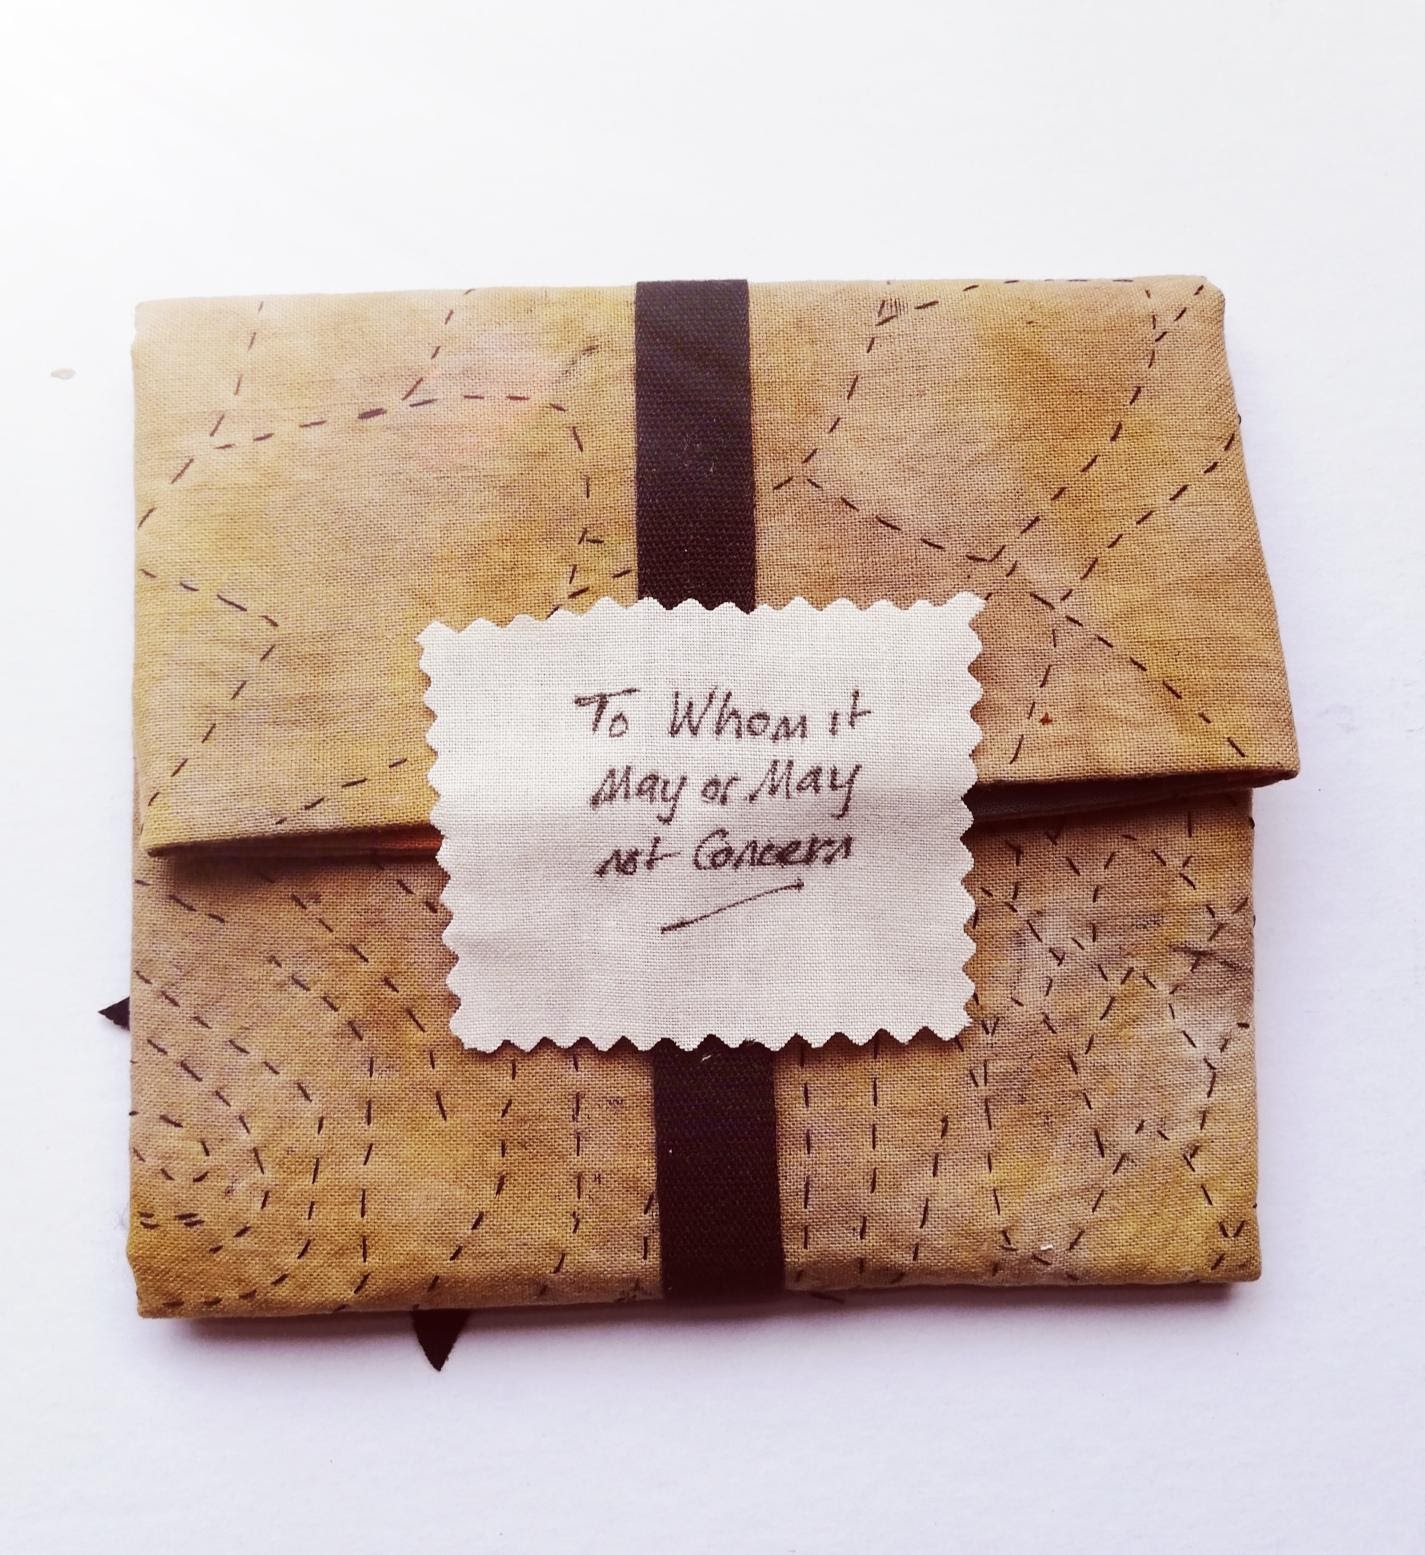
a) The Envelope Form


Inside of Envelope
Carefully undo a 6”/15cms (or thereabouts) square envelope or use a square of paper 9”X9”/23cms – this Is your template.
Place your template on your cloth and draw around it to give you guidelines within which you can do your stitching, patching, embellishing.
Place a shape of cloth at the centre of your cloth (we used a heart), stitch it down and embellish as you wish.
Work from there expressing your thoughts and feelings about Lockdown in any way that's right for you.
Outside of Envelope
Using your template, draw around it on a second piece of cloth and stitch in any way you wish. It could be similar to the inside or entirely different.
When both cloths are complete, with right sides together and matching up your drawn lines, place the template on top and draw around again to give you a stitching (seam) line.
Pin and stitch leaving a 2”/5cms gap for turning out.
Trim off the excess cloth to about 1/4”/1cms and if you have curves clip into the seam allowance at intervals taking care not to clip your stitching.
Press the seams open where you can. Turn the right way out through the gap and press.
Alternatively, you could put your cloths wrong side together, matching drawn lines, pin and trim with scissors and use a decorative stitch around the edge eg. Blanket stitch
Fold in the corners sides first, then bottom and finally top corner to overlap the bottom. Use a press-stud, a button or any other fastener you choose to 'seal' your envelope.
b) The Folded Form
This is based upon the way that letters were done before the invention of envelopes – a Victorian invention. Paper was simply folded, wrapped in string or ribbon, and a small card or slip of paper with the address on.
This requires 2 pieces of cloth – 1 for the inside, 1 for the outside – they can be rectangular or square and we recommend around A4 or a 9” square to give you room for patches and embellishments. However any size rectangle or square can be used.
Put the 'outside' cloth to one side.
Think about what you want to express about this last year and the place you are in now. What colours best express your different emotions? What shapes and textures? These are your internal thoughts for the 'inside' of your letter.
The outside of your 'letter' may look entirely different from the inside or similar – all choices are unique to you.
With right sides together, pin and stitch your cloths together leaving a 3”/7.5cms gap for turning out.
Trim the seams to around 1/4”/1cms and trim off the corners taking care not to snip your stitching.
Press the seams open and turn to the right side through the gap. Press again. Slip stitch the gap closed.
With the inside of the cloth facing you, fold in the left and right sides to the centre. Fold up the bottom about 1”/2.5cms above the centre. Now fold down the top edge (it should overlap the bottom folded edge).
Use ribbon, tape, braid, etc. around the letter and insert or stitch a small cloth to the ribbon with the address – it may be addressed to yourself, a loved one, the community, etc.
c. The Postcard Form
The postcard has been a favourite way of communicating since Victorian times – a short message from someone far away and a very crucial thing during WW1. In that time, particularly in France, beautiful embroidered postcards were sent by British and German troops back home, expressing sentiment, love and longing. And how lovely it is to receive a postcard from someone on holiday – funny or scenic, they're thinking of you! And so, this is a small cloth with a front and back which can be either stitched together and turned right side out or left with raw edges and stitched together with blanket stitch or whatever stitch you choose.


Cut a piece of card about 14.5cmsX10cms OR use a received postcard – this is your template.
You will need a front cloth for the picture and a back cloth for the reverse.
Draw around the template on both of your cloths for guidelines.
Also use your template to cut out a piece of iron-on Vilene at exactly the same size as the template to stiffen your 'card'. Put your reverse cloth and Vilene to one side.
Now your front cloth. Will it be a picture? Will there be words? Stitches only? A tiny cloth envelope with a message in? A pressed flower? (common in embroidered cards).
The reverse cloth. You may want this to look like a postcard in our example or you could do something completely different. It's yours and unique to you.
Iron on the Vilene to which ever cloth is the smoothest depending on what you've applied to the cloths.
To sew the front and back together like a cushion cover, place the two pieces RIGHT sides together, matching drawn lines, pin, stitch leaving a 2”/5cms gap on a long side, for turning out.
Trim all the seams to 1/4”/1cms and clip the corners taking care not to snip your stitching.
Press the seams open and turn to the right side. Press again and slip stitch the gap closed.
Alternatively, having applied the vilene, you could put wrong sides together, trim the seams to 1/4”/1cms or less, matching lines and tack together then stitch the outer edges with blanket stitch or an edging stitch of your choice or even simply use pinking shears.
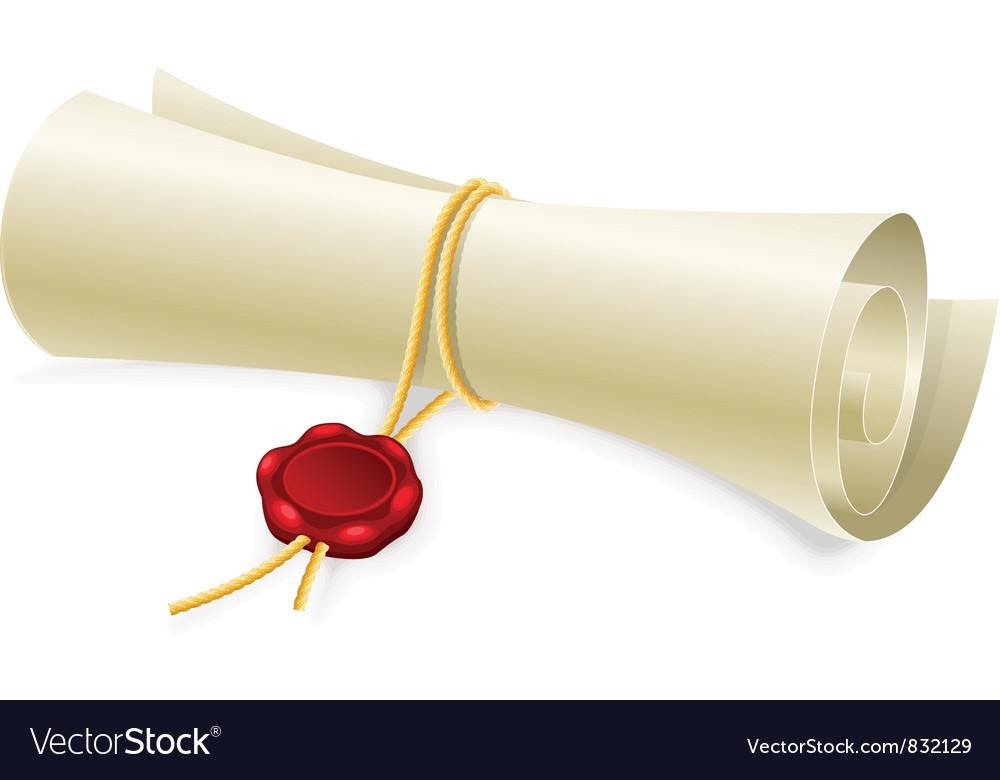
d) The Scroll Form
Here's another idea with no cloth example – it's entirely up to you as to how you might interpret it. It could be one cloth or a front and back cloth, traditionally rolled, tied with a ribbon or string and 'glued' with a wax seal. Any size but usually a rectangle.

If you require any further guidance or help of any kind, including materials please don't hesitate to get in touch with us via email and follow our Facebook page to see what others are doing and post your own work in progress.
Your experience is an important part of the history of this time.
Not everyone feels confident in expressing themselves in words, either written or spoken but it might be that giving your hands something to do through making you find ways of doing just that.
All the pieces produced in response to this project will be shown in a city wide exhibition in the new year – either through photos or in actuality - the Creative Wakefield team have yet to confirm the date.
Obviously your work will only be displayed with your permission and of course, you and all you know are invited to celebrate OUR History and OUR Making.
Stay safe. Stay well and remember, threads connect us even when we're apart.
Best Wishes.
Bea and Jan
2SureThreads
 2SureThreads Promoting Wellbeing
Courses in Slow Stitching and Creative Cloth
2SureThreads runs groups and courses about Slow Stitching, and the processes involved in working with fabric and thread. We encourage everyone to bring their experiences to groups, and share their skills, as a way to bring people together.
Facebook Group: 2SureThreads
Email: 2surethreads@gmail.com
Download File: Slow Stitching - Letters from Lockdown PDF
A note from Crafting4Good CIC:
Thank you to 2SureThreads for their slow stitching tutorial - we look forward to seeing the Letters from Lockdown exhibition in 2021, whether online or in Wakefield.
Slow Stitching Supplies
Want to have a go at slow stitching? Our not-for-profit craft shop in The Ridings Shopping Centre, Wakefield is a treasure trove for fabric, thread, ribbon, lace, buttons etc suitable for slow stitching and textiles projects - all donated by creative people 'de-stashing' and perfectly usable commercial 'waste' such as quality curtain samples, fabric offcuts and end of roll lace and ribbon. Our organisations supports local community groups, mental health and wellbeing through our activities.
You Might Also Like:
Video Card Making Tutorials
Video card making tutorials to go with our printables, from ArdaCards
Card Making Tutorial - Never-Ending Card
Never-ending card making tutorial using downloadable "printables with purpose"
Card Making Tutorial: Acetate Box for Easel Cards
Card making tutorial for making an acetate box lid for a handmade card so you can see the contents. Printables with purpose: crafting for good!
Volunteering & Friends of Crafting4Good CIC
Volunteering is good for you and those you're helping. View our current opportunities and other ways you can support
Weaving The Unremembered
Weaving used to remember The Unremembered from our World War 1 project with Big Ideas
Mental Health and Wellbeing
Mental health and wellbeing support
Pop Up Box Cards
Pop up box card designs, tutorials and a template for commercial use if you want to make and sell your own Pop Up Boxes
Improve Your Wellbeing through Crafting
Crafting can improve your wellbeing, read stories from others about how they use their crafting for good
Positive Psychology Self Care New Ways to Feel Happy
Positive Psychology self care: new ways to feel happy from Action for Happiness


You might also like these
The 24 Strengths of a Person - Discover Yours!
The 24 strengths of a person, measured scientifically in psychology, are their 'superpowers' that get them through life
Volunteering Opportunities with Crafting4Good CIC
Volunteering opportunities supporting our nonprofit organisation and people's creative wellbeing
5 Ways to Wellbeing
The 5 ways to wellbeing and how creativity can help you get there


Recent Articles
-
The 24 Strengths of a Person - Discover Yours!
Feb 28, 25 01:32 PM
 The 24 strengths of a person, measured scientifically in psychology, are their 'superpowers' that get them through life
 -
Art & Craft Ideas: Activity Library
Feb 27, 25 04:03 PM
 Art and craft ideas: self care activities for groups, adults, elderly, kids
 -
DIY Paper Pumpkins: Easy Craft Tutorial for Festive Decor
Feb 27, 25 10:58 AM
 Learn to create charming paper pumpkins with our step-by-step guide, perfect for autumn decorations


Crafting4Good CIC is a not-for-profit Community Interest Company, also trading as Crafting for Good, limited by guarantee and registered in England and Wales Company No.10690435.
Registered office: Suite 4, Unity House, Westgate, Wakefield, WF1 1EP